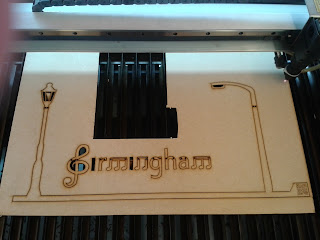
Due to the shape of the box - the 'lid' of the product is thinner to allow space for the changeable backdrops - it was going to be very difficult to attach handles to the top edge.
Instead I decided to make a bag. This also adds slight protection to the product when being moved, and also provided more storage space for the puppets and backdrops - the straps can be carried or are long enough to fit over your shoulder.
As the puppet box is made from MDF and has a raw look about it, I decided to make the case out of calico to match this raw feel about it. Ideally I would have the whole product as eco-friendly and all materials including the case would be made from recycled products.
 |
| Test bag - practising making a bag with a 'gusset' and a bag that is made to measure. |
Originally I had 20 'puppets' which I was going to get laser cut.
Problem 1!
My practice puppet - the bull (see previous post) had 2 QR codes - a large one, and also a smaller one which would fit within the measurements of the handle - both could be scanned & linked to the blog perfectly...However the bull was enlarged for some reason unknown at the time, so when it came to cutting the final puppets out I decided to test the QR codes again at the correct (slightly smaller) size....we could not get it to work at all!
We spent over 6 hours trying different methods to get the QR codes to work - changing the speed/power of the laser - we cleaned the machine - used different pieces of MDF - used perspex - changed the focus of the laser - changed the size of the QR code...
 |
| QR code testing 1 |
 |
| QR code testing 2 |
 |
| Even tried using different material. However this didn't work as the QR code scanner 'reads' the dark/light spaces. |
I had a few problems getting my designs into the laser-cutter software. You have to transfer them to DXF files. Some it would import fine - others it would not!
All files have been made the same way - so I had to transfer the design into another software and save it as a PLOTTER file. However, when I transferred the design it enlarged it slightly (I now know this is why my test bull design was bigger than intended). Again we spent over 6 hours trying to solve as the majority of my DXF files could not be imported... we tried a number of different methods and in the end I had to reduce the size of each puppet in this new software to the correct size. Unfortunately in the process I didn't quite get the size of the tab on the handle quite correct, so some tabs are slightly different sizes!
As a result, I had to reduce the number of puppets I originally wanted to cut out. I didn't have the time to spend adjusting the sizes and there were lots of people waiting to use the software and the machine and I couldn't take up any more time. Unfortunately some of these were iconic and significant landmarks/buildings but had I realised this sooner I would have planned which puppets did/did not get cut.
For the puppets I could not get laser cut - I changed on the cityscenepuppet blog to 'COMING SOON' items!
 |
I had planned to create several more 'moving puppets' - my abstract wheel was a test piece - 2 parts cut separately and joined using a split pin - however due to the problems occurred I was unable to get any more puppets cut.
 |
| Unfortunately in the last week I accidentally dropped the box - bashing the bottom corner & knocking out the hinges. The hinges I glued & screwed back in, but unfortunately the corner could not be fixed, but it is fairly small cosmetic damage. |
 |
| I added hook & eye latches on each side, so that the product can be closed and kept neatly together when being transported or not in use. |
 |
| I used 90-degree hinges so that the lid can stay upright and act as a backdrop. |
 |
| I created 2 'stays' which are inserted on the corners to help support the hinges and to stop the lid closing down on the puppets, or trapping any fingers. They do not lock the hinges open, but just help to support it. They easily push into the corners and can be stored inside the lid with the rest of the puppets. |
Ideally I would like to have etched the skyline on to the lid of the box, to make it visually more attractive, but this is something that should have been done initially before I started gluing bits together & attaching the hinges. It was too much of a risk to attempt this at a later stage incase it didn't work.


No comments:
Post a Comment